
Waterfall Photography
I love waterfalls of all sorts, from small little creeks to the majestic ones. There is something magical and even therapeutic about the flow of water, the sounds and the streams; no wonder that many of the meditation apps use the sounds of waterfalls for helping with that practice.
When shooting waterfalls we are faced with a number of challenges, some technical and some artistic. On the technical side, capturing the water flow with the right smoothness and texture is not easy. Artistically speaking, some of the amazing aspects of waterfalls don’t necessarily lead to a good composition. In the following I’ll summarize different tips and practices that I assembled over many years of practice to help you in your waterfall photography journey.

Fall colors at Acadia National Park (74mm, ISO 400, F11, 5 sec).

A waterfall with lush vegetation in Bali (74mm, ISO 100, F11, 4 sec).
I. Equipment
In addition to a camera, you’ll need these items:
Tripod (new cameras such as the Olympus bodies have great stabilization so if you are the lucky owner of one of these then maybe you can spare this item)
Polarizer
Neutral density filters
Some means of remote release, or maybe rely on the internal timer
Lenses: unfortunately, you’ll need to carry a variety of lenses; don’t forget longer focal length lenses as sometimes it’s better to zoom in and capture a smaller part of a big waterfall.
Microfiber cloth to clean the lens if you get spray from the waterfall.
II. Technique
There are a few technical issues to consider when photographing waterfalls. They are not too difficult, and anybody with a modern camera can get up to speed quickly.
Polarizer: this is one of those accessories that are absolutely necessary when shooting waterfalls. Often, there are reflections from wet rocks that need to be dialed down. Also, a polarizer improves the definition of the water streaks. Play with the angle of the polarizer: sometimes you don't need to turn it all the way to its best rejection angle.
Lighting: direct sunlight on flowing water often leads to blown highlights and unexpected shadows. Diffuse lighting works much better for shooting waterfalls, so you can make good use of those cloudy days! If sunny, I would avoid the noon hours unless direct sunlight is blocked.
Exposure: even when shooting with diffuse lighting, it is easy to blow the highlights in the bright water streaks so make sure you monitor the highlights and choose accordingly. I would still err on underexposing a bit just to avoid this issue.

A very long exposure leads to a super smooth water effect; it seldom works well for fast moving water. (Iceland, 39mm-APS-C, ISO 200, F10, 26 sec).

A shorter exposure time highlights the flow lines and streaks. (Norway, 84mm, ISO 100, F11, 1/3 sec).
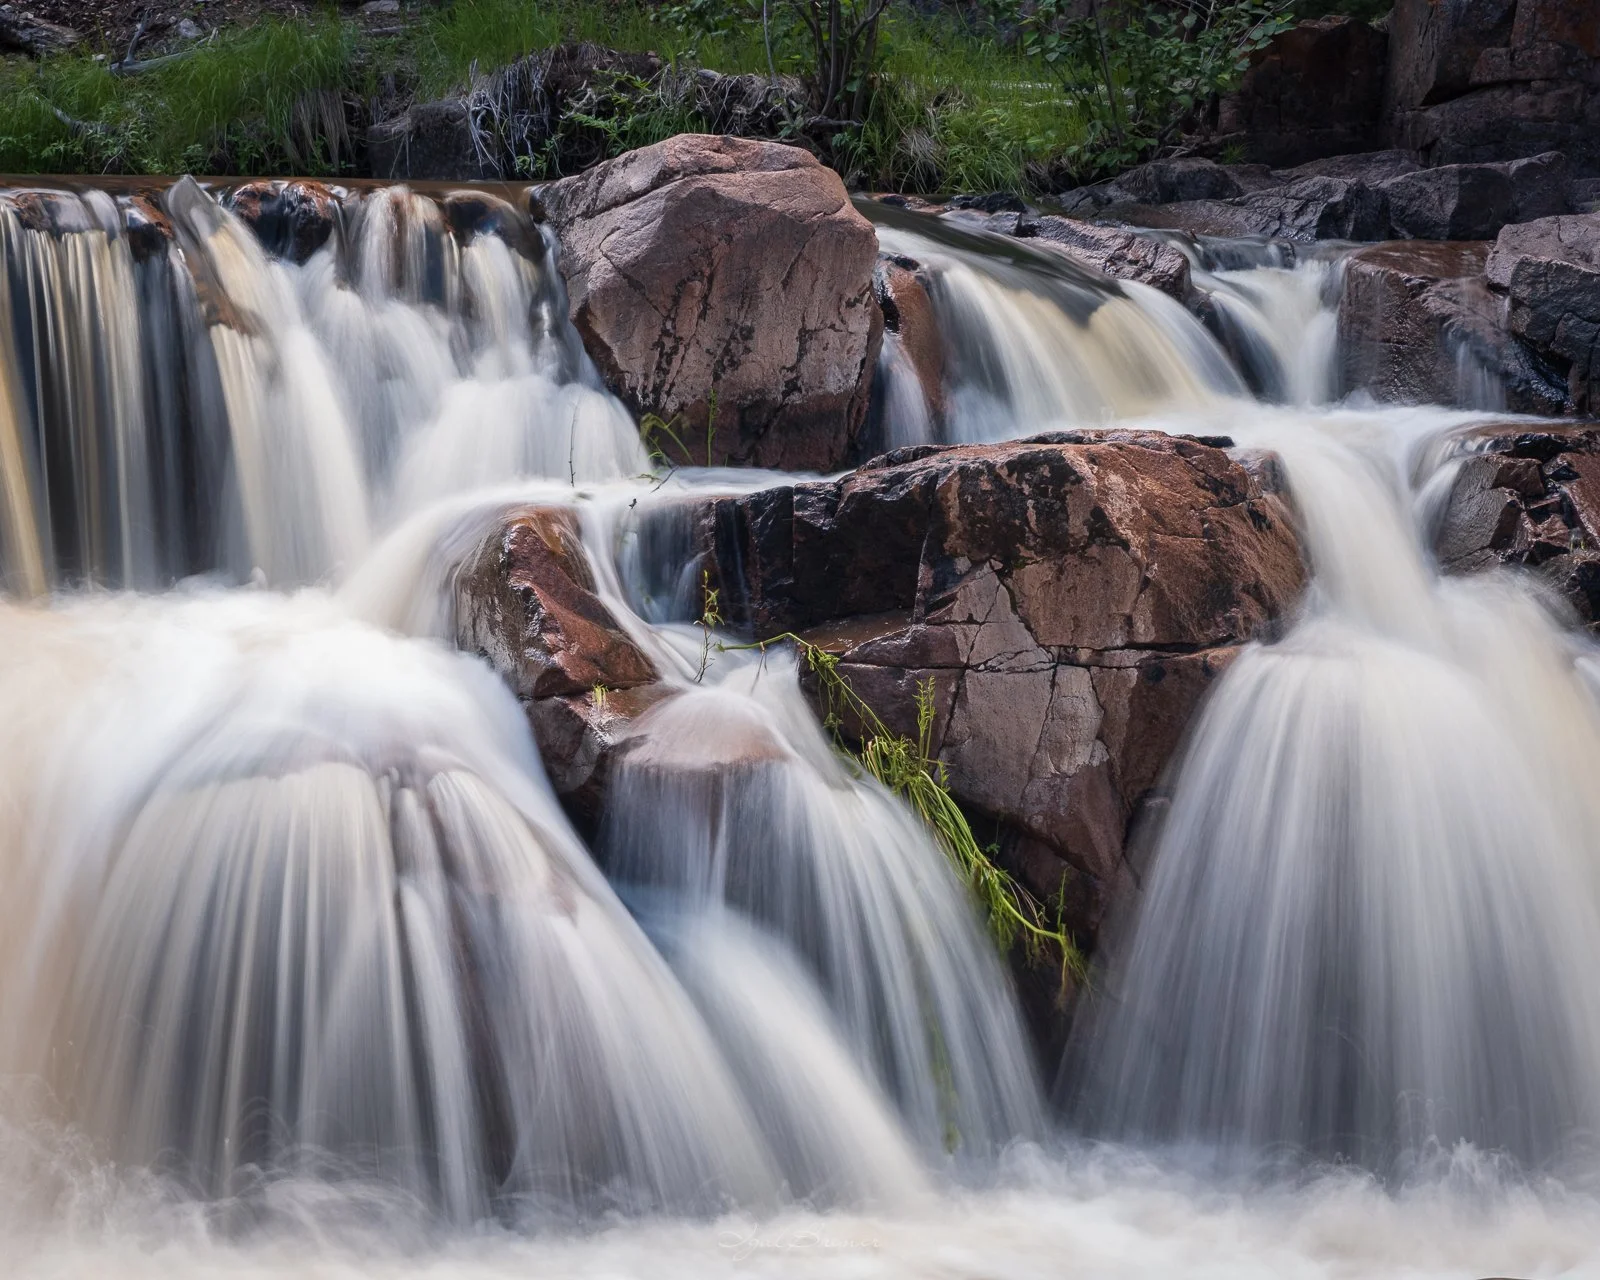
Shutter speed: I believe this is key. In my earlier waterfall shots, I was convinced that longer times were better but lately I started using exposures that are shorter. Each waterfall is different because of the water speed. My advice is to play with the exposure until you get the water streaks you want, without too much water smoothing effect (right now most of my exposures tend to be below 1 sec unless the flow is very slow).
Exposure mode: given the variables in aperture and speed, it is best to shoot in manual mode choosing your speed and aperture, and let the camera choose the ISO.
ND filters and ISO: unless you are shooting in very dark conditions, you most likely will have to use an ND filter. Since ND filter attenuation jumps in discrete values (1, 3, 6, 10 stops), after I put the ND filter and polarizer and choose the shutter speed I let the camera chose the ISO (auto-ISO) but watching that I am still shooting at some low value (<320 or 400, this depends on the camera brand you use).
Long exposure + wind + foliage = disaster. The smallest amount of wind will shake branches and leaves which does not work at all with long exposures. I use two strategies for this and I often use them together: a) shoot continuously for several shots; chances are that one shot will have stationary leaves unless the wind is strong and continuous. b) remove the ND filter (or increase the ISO if no ND filter was used) and shoot one frame with a short shutter speed; you can later blend the frames in post-processing (water: long, leaves/branches: short).

A single tree and a waterfall; one of my favorites! The wind was intermittent and some gusts led to blurry leaves (Utah, 20mm, ISO 800, F10, 0.4 sec).

Reducing the shutter speed improved the water definition. The wind stopped for one of the many shots in the series (Utah, 74mm, ISO 125, F10, 1/4 sec).
Water flow is unpredictable and chaotic so it's better to take several shots for every composition since each shot will look different; storage bits are “free” so I just let the camera shoot continuously for 5-10 shots and later choose the best.
III. Composition and artistic choices:
There is a huge variety of waterfalls, from little streams flowing between small rocks, to the giant majestic waterfalls such as Niagara or Iguazu falls. When faced with majestic, big waterfalls, our tendency is to try and capture everything with a wide-angle lens. Aside from a few exceptions, capturing everything doesn't work well from a composition point of view. Sometimes, it’s better to concentrate on smaller parts and find some unique compositions.

A beautiful waterfall with lush vegetation in Bali (52mm, ISO 100, F11, 6 sec).

A smaller section and waiting for that beautiful light worked really nice (Bali, 70mm, ISO 100, F13, 3 sec).
Use of long focal length: a longer lens allows for isolation, and also shooting from a distance if you can’t get close enough. Don’t forget to bring that long zoom!
Isolation and use of slighter longer focal length: Getting close wasn’t an option so this choice worked (New Mexico, 41mm-APS-C, ISO 400, F13, 0.5 sec).

Iguazu is majestic but overwhelming. Capturing everything is very challenging (18mm APS-C, ISO 200, F8, 2.1 sec).

Getting low (and wet!) and concentrating on a smaller portion leads to a better composition (Iguazu, 12mm APS-C, ISO 400, F8, 1.4 sec).
Angle: I have the feeling that we don’t think about this aspect often, but changing the shooting angle for waterfalls leads to drastically different feelings. Getting low leads to a feeling of intimacy or being inside the flow, so try shooting close to the ground too.

Getting low and close (15mm, ISO 800, F5.4, 0.5 sec).
Other composition “common practices” need to be taken with a grain of salt. For example, many times it’s very hard to control the shooting spot so that streams don’t leave the frame from the lower angles (i.e., keeping the viewer inside of the frame).
Framing: like in all photography, framing offers more composition choices.

Framing: look for framing options, branches, shrubs, etc (Tasmania, 31mm, ISO 100, F11, 0.4 sec).
Other composition options: We shouldn’t get too focused on waterfalls, look for eddies and swirls if shooting in small creeks especially around fall time.

Look for eddies and swirls (Maine, 62mm, ISO 160, F11, 13 sec).
Good luck on your waterfall journey!